Due to inactivity, your session will end in approximately 2 minutes. Extend your session by clicking OK below.

Due to inactivity, your session has expired. Please sign in again to continue.

How to use My Verizon app for prepaid

This guide provides instructions for how to manage your prepaid account using the My Verizon app on your smartphone.

    Getting Started

      Get the My Verizon app for prepaid

      The My Verizon app is already installed on most prepaid devices. If you don't see My Verizon in your Apps menu:

      1. Open the app store on your device (e.g., Google Play™ Store, Apple® App Store®).
      2. Search for "My Verizon".
      3. Tap My Verizon in the search results and follow the onscreen prompts to download the app.
      4. Once the download is complete, open the My Verizon app.
      5. Enter your prepaid mobile number and tap Next.

        Note: If you haven't registered for My Verizon, tap Signup, and follow the steps for registering.
      6. Enter your My Verizon Password and tap Sign In.

        Note: If you tap Remember me, you won't be prompted to enter your number and password every time you open the app on your device.
      7. If prompted, read the Terms & Conditions. If you agree, tap Accept terms.

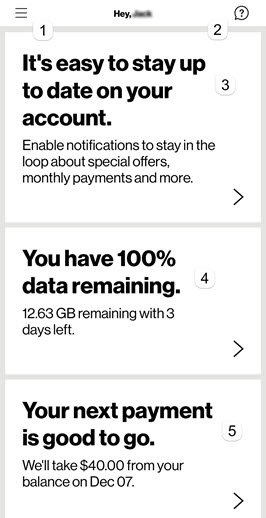
      You've successfully downloaded and opened the My Verizon app for prepaid. You'll see your account feed on the home screen.

      Register for My Verizon

      If you've never used My Verizon before (through the app or a web browser), you need to register your prepaid account to use it. This is a one-time process that sets up your User ID and Password. You can then use those same credentials to sign in to My Verizon through the app or any web browser.

      Smartphones can download the My Verizon app to register.

      To register on the My Verizon app - Visit the My Verizon registration page and follow instructions on our Register via My Verizon app (Prepaid) page.

      If you ever need to, you can sign in to My Verizon through the web browser on any device. Just go to VerizonWireless.com/MyVerizon and enter your User ID and Password.

      Upgrade to the newest version of the My Verizon app

      Keeping your app updated helps ensure you're accessing the latest account management and security features.

      You should receive a notification from the app store on your device when your My Verizon app has an update available. You can tap on that notification and follow the onscreen prompts to update the app.

      Or to manually check for an update:

      1. Open the app store on your device (e.g., Google Play™ Store, Apple® App Store®).
      2. Search for "My Verizon" and tap My Verizon in the search results.
      3. Tap UPDATE if the option is available.

        Note: If you see OPEN instead of UPDATE, there aren't any updates available for your app at this time.
      4. Once the new version has been downloaded to your device, open the My Verizon app.
      5. Enter your prepaid mobile number and tap Next.
      6. Enter your My Verizon Password and tap Sign In.

        Note: If you tap Remember Me, you won't be prompted to enter your number and password every time you open the app on your device.
      7. If prompted, read the Terms & Conditions and, if you agree, tap Accept terms.

      You'll see the home screen of the newest version of the app.

      Sign in to the My Verizon app for prepaid

      To sign in:

      1. Open the My Verizon app on your prepaid mobile device.
      2. Enter your prepaid mobile number and tap Next.

        Note: If you haven't registered for My Verizon, tap Signup, and follow the steps for registering.
      3. Enter your My Verizon Password and tap Sign In.

        Note: If you tap Remember Me, you won't be prompted to enter your number and password every time you open the app on your device.
      4. If prompted, read the Terms & Conditions and, if you agree, tap Accept terms.

      You've successfully signed in to the My Verizon app for prepaid. You'll see your account feed on the home screen.

      Get to know the feed

      The feed appears on the home screen of the My Verizon app. A quick glance at the feed will give you the important data usage and payment information you use most. It helps you easily monitor your account anytime, anywhere.

      1. The Menu icon gives you access to all your account management options, including data, payment and account settings.

      2. The ? icon shows you FAQs about prepaid accounts, payments and add-on features. You'll get instant answers to common questions, without having to listen to hold music.

      3. Never miss out on the latest deal catered to your account. You can quickly see any new offers, account upgrades, and optimal payment status tips for you.

      4. Easily monitor how much data you have left in your bill cycle. The data section gives you the percentage of data, number of GBs, and number of days left in your bill cycle. If you're running low on data, tap the arrow icon to go the Data hub where you can buy more.

      5. With a quick glance, you'll know the date and amount of your next payment. Not sure about your account balance? Tap the arrow icon to check your funds and add more if needed.

      Sign out of the My Verizon app for prepaid

      Signing out can help protect your account from unauthorized use:

      1. In the My Verizon app, tap the Menu icon (3 lines) in the top left corner of the screen.
      2. Tap Sign Out.
      3. Tap Sign Out again.

      You've successfully signed out of the My Verizon app.

    Set up a Prepaid Family Account and Manage Devices

      Add a new line / Set up a Prepaid Family Account

      Only the Account Owner can add a new line to a Prepaid Family Account.

      To set up a new Prepaid Family Account, you need an existing prepaid single line account (you can sign up for a new one if needed). This account will be the Account Owner on the Prepaid Family Account. Sign in to My Verizon with that prepaid account, and then follow these steps to add another line to the account:

      1. In the My Verizon app, tap the Menu icon (3 lines) in the top left corner of the screen.
      2. Tap Devices.
      3. Tap Add device.

        Note: If you already have the maximum number of devices on your account (10 smartphones, tablets or mobile hotspot devices), the Add device button will be gray and you won't be able to add another device.
      4. Tap Another device.
      5. Tap Next.
      6. Tap Let’s go.

        Note: If you need a new SIM card, you can tap Get SIM card and follow the onscreen prompts.
      7. Select the type of device you're adding and tap Next.
      8. Enter the Device ID of the new device and tap Next.
      9. Enter the SIM ID and tap Next.
      10. Select whether you:
        • Need a new phone number - Enter your ZIP code and follow the onscreen prompts to select a new phone number.
        • Want to keep an existing phone number - Enter the phone number you want to use to check if it's eligible to port in. Follow the onscreen prompts to enter the necessary information and port in the number.
      11. Browse for a plan for your new line. Swipe left and right to see plan options, and tap Select under the plan you want.
      12. Review your plan details and tap Got it.
      13. Select whether you want an international plan or not.
      14. Review the details of the new line and tap Next.
      15. Select a payment method and tap Next.
      16. Enter any requested payment information and tap Confirm.
      17. Review the changes to your account.
      18. Read the Terms & Conditions, and tap the I agree to the Terms & Conditions box.
      19. Tap Confirm.

      You've successfully added a new line to your account. You're now financially responsible for the new line. You can manage this new line and device in My Verizon.

      Merge existing prepaid accounts into a Prepaid Family Account

      To merge 2 existing prepaid accounts, open the My Verizon app on the line you want to assign as the Account Owner. The Account Owner is financially responsible for all lines on the Prepaid Family Account. Then follow the steps below to add the other existing prepaid line to the Account Owner's account.

      1. In the My Verizon app, tap the Menu icon (3 lines) in the top left corner of the screen.
      2. Tap Devices.
      3. Tap Add device.

        Note: If you already have the maximum number of devices on your account (10 phones, tablets, mobile hotspots or routers), the Add device button will be gray and you won't be able to add another device.
      4. Tap An active Verizon device.
      5. Tap Next.
      6. Tap Let's go.
      7. Enter the phone number of the line you want to add to your account, and tap Next.
      8. Enter the 4-digit Account Security Code (Account PIN) for the line you're adding, and tap Next.
      9. Select the suggested plan or shop for a different plan.

        Note: You may not be able to keep your same plan when you merge a line on a Prepaid Family Plan. However, in many instances, you can get more data for a lower monthly cost with our current plans.
      10. Select whether or not you want an international plan for the merging line.
      11. Review the changes to your account and tap Next.

      You've successfully merged 2 existing prepaid accounts into a Prepaid Family Account. You're now financially responsible for both lines.

      Manage devices on a Prepaid Family Account

      If you're the Account Owner, you can manage any device on your account:

      1. In the My Verizon app, tap the Menu icon (3 lines) in the top left corner of the screen.
      2. Tap Devices.

      You'll see a list of all the devices on your account. Your device (Account Owner) will be first, followed by the rest of the devices in alphabetical order. Tap Manage under any device to view details and manage that device.

      Upgrade device

      Account Owners and Account Members can purchase a new device for their existing line through the My Verizon app:

      1. In the My Verizon app, tap the Menu icon (3 lines) in the top left corner of the screen.
      2. Tap Shop.
      3. Find the new device you want and tap Select.
      4. If prompted, tap Upgrade under the device you want to upgrade. Otherwise tap Let's go.
      5. Customize your device color and size, and select the accessories you want.
      6. Tap Next.
      7. Tap Check out.
      8. Note: You can also tap Shop more to upgrade more devices or add another line to your account before you check out.

      9. If you don't have a payment method saved to your account, enter your payment information.
      10. Review the details of your order to make sure everything is accurate.
      11. If prompted, review the Verizon Customer Agreement and Terms & Conditions. Tap the box next to each if you accept.
      12. Tap Place Order.
      13. Tap Confirm.

      You've successfully purchased a new device for your existing line. Once you receive your order, you can transfer your contacts and activate your new device.

    Data Hub and Usage Details


      The data hub helps you manage your usage. You can see details about your daily usage and purchase additional data if needed.

      View data usage and additional usage details

      You can quickly see your data usage for the current bill cycle right from your feed on the My Verizon app home screen.

      Additional usage details are available in the data hub:

      1. In the My Verizon app, go to the data section of your feed and tap View details.
      2. Tap Details at the top of the screen.
      3. Select the type of usage details you want to see:
        • Data - Shows each date you've used data, the percentage used and the GBs used
        • Minutes - Shows each phone number you've spoken to, the date of the call and the minutes used
        • Text messages - Shows the mobile number of each message sent/received, the date and time

      You'll see the details of the type of usage you selected on the screen.

      Get more data / Purchase Data Boost

      A Data Boost is extra high-speed data you can purchase as needed if you run low. You can have up to 2 Data Boosts on your account at a time. Data Boosts on your account will automatically be used after your entire monthly allowance is gone.

      Note: Data Boosts aren't available for current prepaid data only plans.

      To purchase a Data Boost:

      1. In the My Verizon app, go to the data section of your feed and tap View details.
      2. Tap Get more data.
      3. Tap Data Boost, and then tap Next.

        Note: You can also select Upgrade plan if you'd like to switch to a monthly plan with more data.
      4. Select the amount of data you want to buy and tap Next.
      5. Tap Purchase data.

      You've successfully purchased a Data Boost.

      View international usage

      If you call or text international numbers while you're in the US, you can monitor your usage for the month from the data hub:

      1. In the My Verizon app, go to the data section of your feed and tap View details.
      2. Tap International.

      You'll see your current international plan (if you have one), along with the amount you've spent on international calls and texts during your current bill cycle.

    Payments

      Keep track of your account balance and manage your one-time payments, all in the palm of your hand.

      View account balance

      Your available balance is the amount of money you currently have on your prepaid account. You can use these funds to pay monthly plan and usage costs. Your monthly plan costs will automatically be deducted from this balance on your due date.

      To view your available balance:

      1. In the My Verizon app, tap the Menu icon (3 lines) in the top left corner of the screen.
      2. Tap Payment.

      You'll see the available balance on your account. The monthly plan costs and due date will also be listed, so you can easily see if you need to add funds.

      Add funds to your account

      If you aren't registered for My Verizon yet or don't have your My Verizon ID and password, you can use Prepaid Instant Pay to add funds to your account.


      To add funds to your account through My Verizon:

      1. In the My Verizon app, tap the Menu icon (3 lines) in the top left corner of the screen.
      2. Tap Payment.
      3. Tap Add funds.
      4. Select the type of card you want to use and tap Next.
        • Credit/debit card
        • Verizon refill card
        Note: If you already have a payment method saved on your account, that card will appear as an option as well. You can select that option to use it to add funds.
      5. Enter the requested card information and tap Confirm.

        Note: If you want to use the same credit/debit card in the future without having to re-enter all the information, tap Save this card to my account.
      6. Enter the amount of money you want to add and tap Next.
      7. Review the payment and tap Confirm.

      You've successfully added funds to your prepaid account.

      Send funds to another line on a Prepaid Family Account

      The Account Owner on a Prepaid Family Account can send funds to any line on the account. Account Members can only send funds to the Account Owner.

      1. In the My Verizon app, tap the Menu icon (3 lines) in the top left corner of the screen.
      2. Tap Payment.
      3. Tap Send funds.

        Note: If you're the Account Owner:
        • Select the line you want to send funds to, and tap Next.
        • Select the payment method you want to use, and tap Next.

          Note: If you want to use a new credit/debit card, you'll need to enter the requested card information.
      4. Enter the amount of money you want to send (up to $250).

        Note: If you're an Account Member, you can only send funds using your available balance. If you don't have funds on your line, you'll need to add funds to your line first.
      5. Tap Send.
      6. Review the transaction, and tap Confirm.

      You've successfully sent funds to another line on your account.

      View payment history

      See a record of all monetary changes to your account, including times you've added funds to your balance and times money was deducted from your balance to cover account costs:

      Note: If you're on a Prepaid Family Account, only the Account Owner can view the account's payment history.

      1. In the My Verizon app, tap the Menu icon (3 lines) in the top left corner of the screen.
      2. Tap Payment.
      3. Tap History at the top of the screen.
      4. Select the type of payment history you'd like to see:
        • Review past payments - Each time you've added funds to your account, including the amount, date and card used
        • Review balance details - All changes to your balance, including the date of each change, amount added or deducted, and type of change like:
          • Deductions for plan costs, purchases and subscriptions
          • Funds added to your account
          • Credits to your account

      You'll see the list of the type of history you selected on the screen.

      Add payment method

      You can only have one payment method saved to your account. If you already have a payment method saved, delete the existing payment method before completing these steps:

      1. In the My Verizon app, tap the Menu icon (3 lines) in the top left corner of the screen.
      2. Tap Payment.
      3. Tap Payment Methods at the top of the screen.
      4. Tap Manage payment method.
      5. Enter the requested card information.
      6. Tap Confirm.

      You've successfully saved a payment method to your account.

      Edit payment method

      You can update the expiration date or other information for your existing payment method, anytime:

      1. In the My Verizon app, tap the Menu icon (3 lines) in the top left corner of the screen.
      2. Tap Payment.
      3. Tap Payment Methods at the top of the screen.
      4. Tap Manage payment method.
      5. Tap the payment card picture on the screen.
      6. Edit the information and tap Update.

      You've successfully updated the payment method you have saved.

      Delete payment method

      If you want to add a new payment method or not have a payment method saved on your account, you can delete your current payment method anytime:

      1. In the My Verizon app, tap the Menu icon (3 lines) in the top left corner of the screen.
      2. Tap Payment.
      3. Tap Payment Methods at the top of the screen.
      4. Tap Manage payment method.
      5. Tap the payment card picture on the screen.
      6. Tap Remove Card.
      7. Tap Yes.

      You've successfully deleted the payment method from your account.

    Auto Pay

      With Auto Pay, you never have to worry about missing a payment. It will automatically pay your monthly bill on the due date using your credit/debit card. Auto Pay will use any available funds you have on your account first. Then it will charge the remaining balance to your credit/debit card.

      Plus, you can receive up to $10/month per line discount with eligible prepaid monthly plans.

      Set up Auto Pay

      You can set up Auto Pay through the Payment hub of the My Verizon app. If you buy a new phone online, you also have the option to set up Auto Pay during the purchase process.

      Note: If you're on a Prepaid Family Account, only the Account Owner can set up Auto Pay.

      To set up Auto Pay through the Payment hub:

      1. In the My Verizon app, tap the Menu icon (3 lines) in the top left corner of the screen.
      2. Tap Payment.
      3. Tap Auto Pay.
      4. Read the Terms & Conditions, and if you agree, tap Agree to terms and conditions.
      5. Tap Next.
      6. Set up your payment method:
        • If you already have a card saved to your account, tap Use this card.
        • If you don't have a payment method saved to your account:
          • Tap Add new card.
          • Fill out the requested credit/debit card information and tap Confirm.
      7. Review the Auto Pay information, and tap Yes.

      You've successfully set up Auto Pay.

      Note: If you have an existing balance on your account, Auto Pay will use the funds on your account first to make payments. It will then charge any remaining amount to your credit/debit card.

      Manage Auto Pay

      You can edit the information for the payment method you're using for Auto Pay, or you can switch to a different payment method.

      Note: If you're on a Prepaid Family Account, only the Account Owner can manage Auto Pay.

      1. In the My Verizon app, tap the Menu icon (3 lines) in the top left corner of the screen.
      2. Tap Payment.
      3. Tap Auto Pay.
      4. If prompted, read the Terms & Conditions. If you agree, tap I agree to the terms and conditions, and then tap Got it.
      5. Tap Edit Payment.
      6. Select the change you want to make:
        • To edit your current payment method (e.g., update expiration date, CVC, etc.):
          • Tap the payment card picture on the screen.
          • Edit the information listed for the card and tap Update.
        • To use a different payment method:
          • Tap Use new card.
          • Enter the requested credit/debit card information for your new card and tap Confirm.

      You've successfully updated the payment method for Auto Pay.

      Turn off Auto Pay

      If you turn off Auto Pay, you'll need to make manual payments each month. If you're late, you won't be able to use your phone. You'll also no longer receive any Auto Pay discounts you may have been getting.

      Note: If you're on a Prepaid Family Account, only the Account Owner can turn off Auto Pay.

      1. In the My Verizon app, tap the Menu icon (3 lines) in the top left corner of the screen.
      2. Tap Payment.
      3. Tap Auto Pay.
      4. Tap Turn Off.
      5. Tap Yes.

      You've turned off Auto Pay.

    Plan and Services

      View your current plan and explore other plans available, including international calling plans. You can also manage your services (e.g., Call Filter Plus, Verizon Cloud, etc.) with just a few taps.

      View current plan details

      To see your current plan and what's included:

      1. In the My Verizon app, tap the Menu icon (3 lines) in the top left corner of the screen.
      2. Tap Account.

        Note: If you're the Account Owner of a Prepaid Family Account, you'll need to also select the line you want to manage.
      3. Tap My Plan.
      4. You’ll see the monthly cost and data amount included with your current plan. Tap See current plan details for more information.

      You'll see additional benefits that are included with your current plan.

      Change plan

      You can change your plan any time in My Verizon:

      Note: If you're on a Prepaid Family Account, only the Account Owner can change the plan on your line.

      1. In the My Verizon app, tap the Menu icon (3 lines) in the top left corner of the screen.
      2. Tap Account.

        Note: If you're the Account Owner of a Prepaid Family Account, you'll need to also select the line you want to change.
      3. Tap My Plan.
      4. Tap Explore plans.
      5. Swipe right and left to view the different plans available, and tap Select under the plan you want to have.
      6. Review the changes to your account and tap Purchase.

      You've successfully changed your plan.

      Sign up for an international calling plan

      If you frequently speak with people in other countries while you're in the US, an international calling plan can be a more affordable option. To view available international calling plans and add one to your account:

      Note: If you're on a Prepaid Family Account, only the Account Owner can add an international calling plan to your line.

      1. In the My Verizon app, tap the Menu icon (3 lines) in the top left corner of the screen.
      2. Tap Account.

        Note: If you're the Account Owner of a Prepaid Family Account, you'll need to also select the line you want to manage.
      3. Tap My Plan.
      4. Tap International Calling at the top of the screen.
      5. Tap Explore plans.
      6. Tap Select under the plan you want to purchase.

        Note: For more information about a plan, including rate information, tap See plan details.
      7. Read the Terms and Conditions, and if you agree, tap I agree to the Terms and Conditions.
      8. Tap Purchase.

      You've successfully added an international calling plan to your account. You can change your international calling plan anytime.

      View current international calling plan

      To see your current international calling plan and what's included:

      1. In the My Verizon app, tap the Menu icon (3 lines) in the top left corner of the screen.
      2. Tap Account.

        Note: If you're the Account Owner of a Prepaid Family Account, you'll need to also select the line you want to view.
      3. Tap My Plan.
      4. Tap International Calling at the top of the screen.
      5. Tap See plan details.

      You'll see the plan details of your current international calling plan.

      Change international calling plan

      You can change your international calling plan anytime, but you can only have one international plan active at a time. You'll be charged the full amount for the new plan at the time of purchase and at the start of each bill cycle for as long as the plan is active on your account.

      Note: If you're on a Prepaid Family Account, only the Account Owner can change the international calling plan on your line.

      1. In the My Verizon app, tap the Menu icon (3 lines) in the top left corner of the screen.
      2. Tap Account.

        Note: If you're the Account Owner of a Prepaid Family Account, you'll need to also select the line you want to manage.
      3. Tap My Plan.
      4. Tap International Calling at the top of the screen.

        Note: You'll see your current international calling plan on this screen. You can also tap See plan details for more information about what is included with your current plan.
      5. Tap Explore plans.
      6. Tap Select under the plan you want.

        Note: For more information about the plan, tap See destinations.
      7. Review the changes to your plan and read the Terms and Conditions. If you agree, tap I agree to the Terms and Conditions.
      8. Tap Purchase.

      You've successfully changed your international calling plan.

      Remove international calling plan

      If you remove your international calling plan, you'll be charged the full rate for any international calls you make.

      Note: If you're on a Prepaid Family Account, only the Account Owner can remove an international calling plan from your line.

      1. In the My Verizon app, tap the Menu icon (3 lines) in the top left corner of the screen.
      2. Tap Account.

        Note: If you're the Account Owner of a Prepaid Family Account, you'll need to also select the line you want to manage.
      3. Tap My Plan.
      4. Tap International Calling at the top of the screen.
      5. Tap Remove.
      6. Tap Confirm.

      You've successfully removed your international calling plan.

      Enable Prepaid TravelPass®

      Prepaid TravelPass lets you use your prepaid plan while traveling in certain countries for a flat daily rate. Learn more in our Prepaid TravelPass FAQs.

      Note: TravelPass isn't available on prepaid data only plans.

      To enable Prepaid TravelPass:

      1. Open the My Verizon app for Prepaid on your device.
      2. Tap the Menu icon (3 lines) in the top left corner of the screen.
      3. Tap Account.
      4. Tap My Plan.
      5. Tap the International tab at the top of the screen.
      6. Tap Explore plans.
      7. Tap A travel plan, and tap Next.
      8. Tap Next again.
      9. Select your destination from the dropdown, and tap Next.
      10. Enter how many days you'll be out of the US, and tap Next.
      11. Review your estimated costs, and tap Next.
      12. Read the Terms and Conditions, and if you agree, tap the I agree to the Terms and Conditions box.
      13. Tap Enable.
      14. Tap Confirm.

      You've successfully added TravelPass to your line.

      Disable Prepaid TravelPass

      To disable Prepaid TravelPass:

      1. Tap the Menu icon (3 lines) in the top left corner of the screen.
      2. Tap Account.
      3. Tap My Plan.
      4. Tap International.
      5. Tap TravelPass enabled.
      6. Tap Disable.
      7. Tap Confirm.

      You've successfully disabled TravelPass on your line. You can enable it again anytime.

      Get a new add-on feature

      Services are features you can add to your prepaid service to customize it to fit your needs. Some services have a monthly subscription charge, and others are free to add.

      Note: If you're an Account Member on a Prepaid Family Plan, the Account Owner will need to add any paid features to your line that you may want.

      1. In the My Verizon app, tap the Menu icon (3 lines) in the top left corner of the screen.
      2. Tap Account.

        Note: If you're the Account Owner of a Prepaid Family Account, you'll need to also select the line you want to manage.
      3. Tap Services.
      4. Tap Add under the add-on that you'd like to sign up for.

        Note: If you'd like to know more about an servicesdd-on, tap See Details under the add-on.
      5. Tap Confirm.

      You've successfully signed up for a new add-on.

      Remove an add-on

      To remove an add-on:

      1. In the My Verizon app, tap the Menu icon (3 lines) in the top left corner of the screen.
      2. Tap Account.

        Note: If you're the Account Owner of a Prepaid Family Account, you'll need to also select the line you want to manage.
      3. Tap Add-Ons.
      4. Tap Remove under the add-on you want to remove.
      5. Tap Confirm.

      You've successfully removed the add-on from your account. You can add it again anytime.

    Account

      Your account security and privacy are important. The My Verizon app helps you manage your account profile and security settings no matter where you are. It keeps you in control and gives you peace of mind.

      If you're the Account Owner on a Prepaid Family Account, you'll also be able to see an overview of all lines on your account and transfer account ownership to another line.

      See account overview on a Prepaid Family Account

      As the Account Owner on a Prepaid Family Account, you can get a high-level look at all the lines on your account. Account Members can only view information for their own line.

      1. In the My Verizon app, tap the Menu icon (3 lines) in the top left corner of the screen.
      2. Tap Account.

      You'll see a list of all lines on your account. You can select a line to see an overview for that line.

      Change Account Owner on a Prepaid Family Account

      The Account Owner is financially responsible for all lines on the Prepaid Family Account, and they have access to view and manage all the lines through My Verizon. There can only be one Account Owner on an account. Learn more about account roles on a Prepaid Family Account in our FAQs.

      Note: Only the current Account Owner can transfer account ownership to another line.

      To change the Account Owner:

      1. In the My Verizon app, tap the Menu icon (3 lines) in the top left corner of the screen.
      2. Tap Account.
      3. Tap Your line (Account Owner line).
      4. Tap Settings.
      5. Tap Transfer account ownership.
      6. Tap Next.
      7. Select the line you're transferring account ownership to.
      8. Tap Next.
      9. Select whether or not you want to send funds to the new Account Owner to cover the renewal cost for the account.

        Note: If you select Send a different amount, enter the amount you want to send and tap Next.
      10. Tap Next.
      11. Review the changes that will be made to the account and tap Transfer.
      12. Tap Confirm.

      You've successfully changed the Account Owner on your Prepaid Family Account. If you had Auto Pay set up, it will be automatically turned off. The new Account Owner will need to set up Auto Pay again using their payment method.

      Change your profile (billing address, email, etc.)

      Your profile contains your greeting name, billing address, email address and alternate phone number. Keeping this information updated helps ensure you receive important notifications about your Verizon account.

      To change your profile and contact information:

      1. In the My Verizon app, tap the Menu icon (3 lines) in the top left corner of the screen.
      2. Tap Account.

        Note: If you're the Account Owner of a Prepaid Family Account, you'll need to also select the line you want to update. The billing address for the account can be found under your own line.
      3. Tap Account Settings.
      4. Tap Manage Profile.
      5. Enter or change any of the following information and tap Update:
        • Greeting name
        • Email
        • Alternate Contact Number
        • Billing Address

      You've successfully updated your profile.

      Change User ID

      Your User ID can be used to sign in to My Verizon. Changing it regularly can help protect your account from unauthorized use.

      1. In the My Verizon app, tap the Menu icon (3 lines) in the top left corner of the screen.
      2. Tap Account.

        Note: If you're the Account Owner of a Prepaid Family Account, you'll need to also select the line you want to update.
      3. Tap Account Settings.
      4. Tap Security.
      5. Tap Edit User ID.
      6. You'll see your current User ID. Tap Edit to change it.
      7. Enter the new User ID you want, following these requirements:
        • Must be 6-60 characters
        • Can include letters and/or numbers
        • Can include these special characters:
          • At symbol: @
          • Dash: -
          • Apostrophe: ‘
          • Underscore: _
          • Plus sign: +
        • Can't contain spaces
        • Can't match your Password
      8. Tap Update.

      You've successfully changed your User ID.

      Remember to never share your User ID and password with other people. Keeping your credentials private helps to keep your account secure.

      Change Account PIN

      Your Account PIN is a 4-digit security number that helps keep your account credentials private and secure.

      1. In the My Verizon app, tap the Menu icon (3 lines) in the top left corner of the screen.
      2. Tap Account.
      3. Tap Account Settings.
      4. Tap Security at the top of the screen.
      5. Tap Change Account PIN.
      6. Enter a new 4-digit number, following these requirements:
        • No consecutive numbers: 1234
        • No repeating numbers: 1111
        • No numbers from your social security or phone number
      7. Tap Next.
      8. Enter the same 4-digit number again to confirm it, and tap Next.

      You've successfully changed your Account PIN.

      Remember to never share your Account PIN with other people. Keeping it private helps protect your account from unauthorized use.

      Change password

      Changing your password frequently helps keep your My Verizon account secure:

      1. In the My Verizon app, tap the Menu icon (3 lines) in the top left corner of the screen.
      2. Tap Account.
      3. Tap Account Settings.
      4. Tap Security at the top of the screen.
      5. Tap Change password.
      6. Enter your current password.
      7. Enter a new password, following these requirements:
        • Can have uppercase and lowercase letters (it's case-sensitive)
        • Must be 8-20 characters
        • Must have at least 1 letter and 1 number
        • Can include common special characters (e.g., !, &, $, #, etc.)
        • Can't contain spaces
        • Can't match your User ID
      8. Enter your new password again to confirm it.
      9. Tap Update.

      You've successfully updated your password.

      Remember to never share your User ID and password with other people. Keeping your credentials private helps protect your account from unauthorized use.


      Change security question

      Your security question helps verify your identity when you sign in to My Verizon.

      1. In the My Verizon app, tap the Menu icon (3 lines) in the top left corner of the screen.
      2. Tap Account.
      3. Tap Account Settings.
      4. Tap Security at the top of the screen.
      5. Tap Change security question.
      6. Select a security question from the dropdown.
      7. Enter your answer (can contain letters, numbers, spaces and periods).
      8. Tap Update.

      You've successfully updated your security question.

      Remember, never share your security question and answer with other people. Keeping it private helps protect your account from unauthorized use.

      Change Voicemail PIN

      Your Voicemail PIN is the password you need to enter to access your Voicemail box:

      1. In the My Verizon app, tap the Menu icon (3 lines) in the top left corner of the screen.
      2. Tap Account.
      3. Tap Account Settings.
      4. Tap Security at the top of the screen.
      5. Tap Change Voicemail PIN.
      6. Enter the new number you want, following these requirements:
        • Must be 4-7 digits
        • Can't be consecutive numbers (1234)
        • Can't be repeating numbers (1111)
      7. Enter the number again to confirm it.
      8. Tap Update.

      You've successfully updated your Voicemail PIN.

      Change notification settings

      You can choose how you want to receive notifications about special deals and promos:

      Note: You'll still receive important notifications regarding your account and service, even if you opt out of these deals and promo notifications.

      1. In the My Verizon app, tap the Menu icon (3 lines) in the top left corner of the screen.
      2. Tap Account.
      3. If you have multiple lines on your account, select the line you want to change notifications for.
      4. Tap Preferences.
      5. Tap the Email switch to turn email notifications on and off.
      6. Note: When the switch is green, you'll receive notifications by email.

      7. Select how you want to receive notifications on your phone:

        Note: None of these options count towards your messaging allowance.

        • Text messages: These will appear in your messaging app, just like a message you’d receive from a friend or family member.
        • Push notifications: These will appear as a pop-up notification on your screen, not in your messaging app.
        • I don't want mobile notifications – You won’t receive notifications on your phone.
      8. Tap Update.

      You've successfully changed your notification settings.

      Suspend Service

      If you need to temporarily suspend your service (e.g., your device is lost or stolen), you can do so to prevent unauthorized charges. This isn't the same as permanently canceling your service.

      • Single line prepaid accounts: Your account will still be billed while suspended, if your account has available funds.
      • Prepaid Family Accounts: If you suspend the Account Owner's line, you'll still be billed for the line while it's suspended. If you suspend an Account Member's line, you won't be billed for that line on your renewal date while it's suspended.

      Note: If you have recurring features on your line, turn them off before suspending service to avoid being charged for them.

      Learn more about suspending service

      To suspend service using your mobile device:

      Note: If you don't have your mobile device, refer to our steps for Suspending Service through a web browser.

      1. In the My Verizon app, tap the Menu icon (3 lines) in the top left corner of the screen.
      2. Tap Account.

        Note: If you're the Account Owner of a Prepaid Family Account, you'll need to also select the line you want to suspend.
      3. Tap Account Settings.
      4. Tap Suspend Service.
      5. Tap Suspend.

        Note: If you're the Account Owner on a Prepaid Family Account and suspending your own device, select whether or not you want to transfer account ownership to another line to avoid paying for your line while it’s suspended. Follow the steps to Change Account Owner and transfer funds if desired.
      6. Tap Confirm.

      You've successfully suspended your service through the My Verizon app. If you recover your device or have a replacement device, you can reconnect service anytime.

      Note: If your line is suspended for more than 90 days, your number will be disabled. If you have a single line account, your account will be closed.

      Reconnect Service

      If you suspended your service because your device was lost or stolen, you can reconnect through My Verizon. It may take up to 60 minutes to completely reconnect your service once you finish the steps below.

      Note: If you're an Account Member on a Prepaid Family Account, you can reconnect your own line through a web browser if you suspended it during the current bill cycle. If you suspended your device during a previous bill cycle, the Account Owner will need to reconnect service for you.

      • If you're reconnecting with a replacement device: Follow the steps to reconnect service through a web browser. You can use the web browser on any mobile device or computer.
      • If you found the device you lost:
        1. Open the My Verizon app on your device.
        2. Tap Reconnect Service in the Suspended Service section of your feed.
        3. Tap Reconnect.

      Note: You may be prompted to add funds to your account if you're reconnecting service during a different bill cycle. This is because you didn't pay for your service on your renewal date. You may not need to pay your standard full renewal amount, depending on how many days are left in your bill cycle. Follow the onscreen prompts to add funds and reconnect your service.

      You've successfully reconnected your service on your original device.